Friday, October 21, 2016

Sending happy mail and thank you cards

Hi.. Crafty friends...

Here I am with my second DT post. To be frank I really struggled and liked the process of these 3 cards. I hope you are playing along with our October challenge which is a recipe. Please do read Guidelines carefully before linking your project.

Card #1
** I masked the card base (1"around the card base), placed the stencil diagonally on the base and secured with masking tape.
** I mixed candid apple distress ink with texture paste, applied it through stencil. Left it dry on its own.
** Die cut the scalloped frame (bigger) with same CS, few vellum fern flourishes and one white fern flourish.
** I double heat embossed the CS fern flourish with gold embossing powder to give it dimension. Die cut few Thank you, adhered them together and heat embossed with white embossing powder.
** To assemble the card, I foam mounted the frame on card base around the stencilled area. I put silver embroidery floss on top of which glued ferns. Added the sentiment.


Here is a close up of die cut embellishments, just love this texture of white embossing powder.


I am entering this card to

Paru's card making challenge


__________________________________________________

Card #2

** This was real fun to make. I just kept die cutting stitched bubble die.
** Used distress inks in blue range to blend over them.
** I stamped the image towards bottom and coloured with Staedler water colour pencils.
** Stamped sentiment with black ink.
** Used stitched rectangle die to die cut these panels.
** I glued these panels with liquid glue leaving little space in between.


Here is a closer look of die cut 


I am entering this card to

CAS(E) this sketch #195


Card #3

** This is water colour card. I stamped the flourish image with versa mark ink and heat embossed with white embossing powder.
** Used zig markers to colour flowers and leaves.
** Die cut the panel and foam mounted it on a grey CS.
** For sentiment, I die cut 2 times with grey CS and once with water colour paper.
** I used Zig marker to add shade to the die cut sentiment.
** Added few sequins.


Closer look of die cut sentiment


I am entering this card to

Stamplorations - CAS card chellenge


Mod squad challenge - The way we were

Inspired by own card (CASing )


Thank you for your love..
Suggestions are always welcome..

Thursday, October 13, 2016

Peek-a-boo october release

Hi..

Crafty friends..
Here I am with 3 cards for Peek-a-boo designs. 

Card #1

** This was the card which i made when i was struggling with ideas. 
** I secured card base n stencil and applied embossing paste.  Left it to dry of its own. 
** Sprayed gold shimmer mist from ranger. 
** Gold heat embossed two butter flies and fussy cut them out.
** Coloured one butterfly with copics (carefully) and few strokes with gold marker. Glued it on other plain butterfly.  
** Heat embossed sentiment on vellum n sandwiched it between two scalloped circles. 
** Placed sentiment n butterfly with liquid glue. 
** To finish the card added few rainstones towards top n 3 more on butterfly's body.


Here is closeup of butterfly n gold shimmer mist.


I am entering this card to

 (1 sentiment, 2 die cuts, 2 fussy cut images, 1 stencil)


___________________________________

Card #2

** This is my first attempt in colouring on vellum. 
** I stamped & gold heat embossedin the image on vellum. 
** Used few copics to colour it on back (many have said that colouring directly on heat embossed image with copics will damage copic nibs). 
** I didn't feel like taking risk with glueing vellum on card front. So i left 1/2" towards top so that i can fold and glue it behind. 
** Heat embossed sentiment with gold embossing powder. 
** Added few enamel dots to the card.


Here is close up sentiment and the the coloured flowers.


I am entering this card to


_____________________________________________


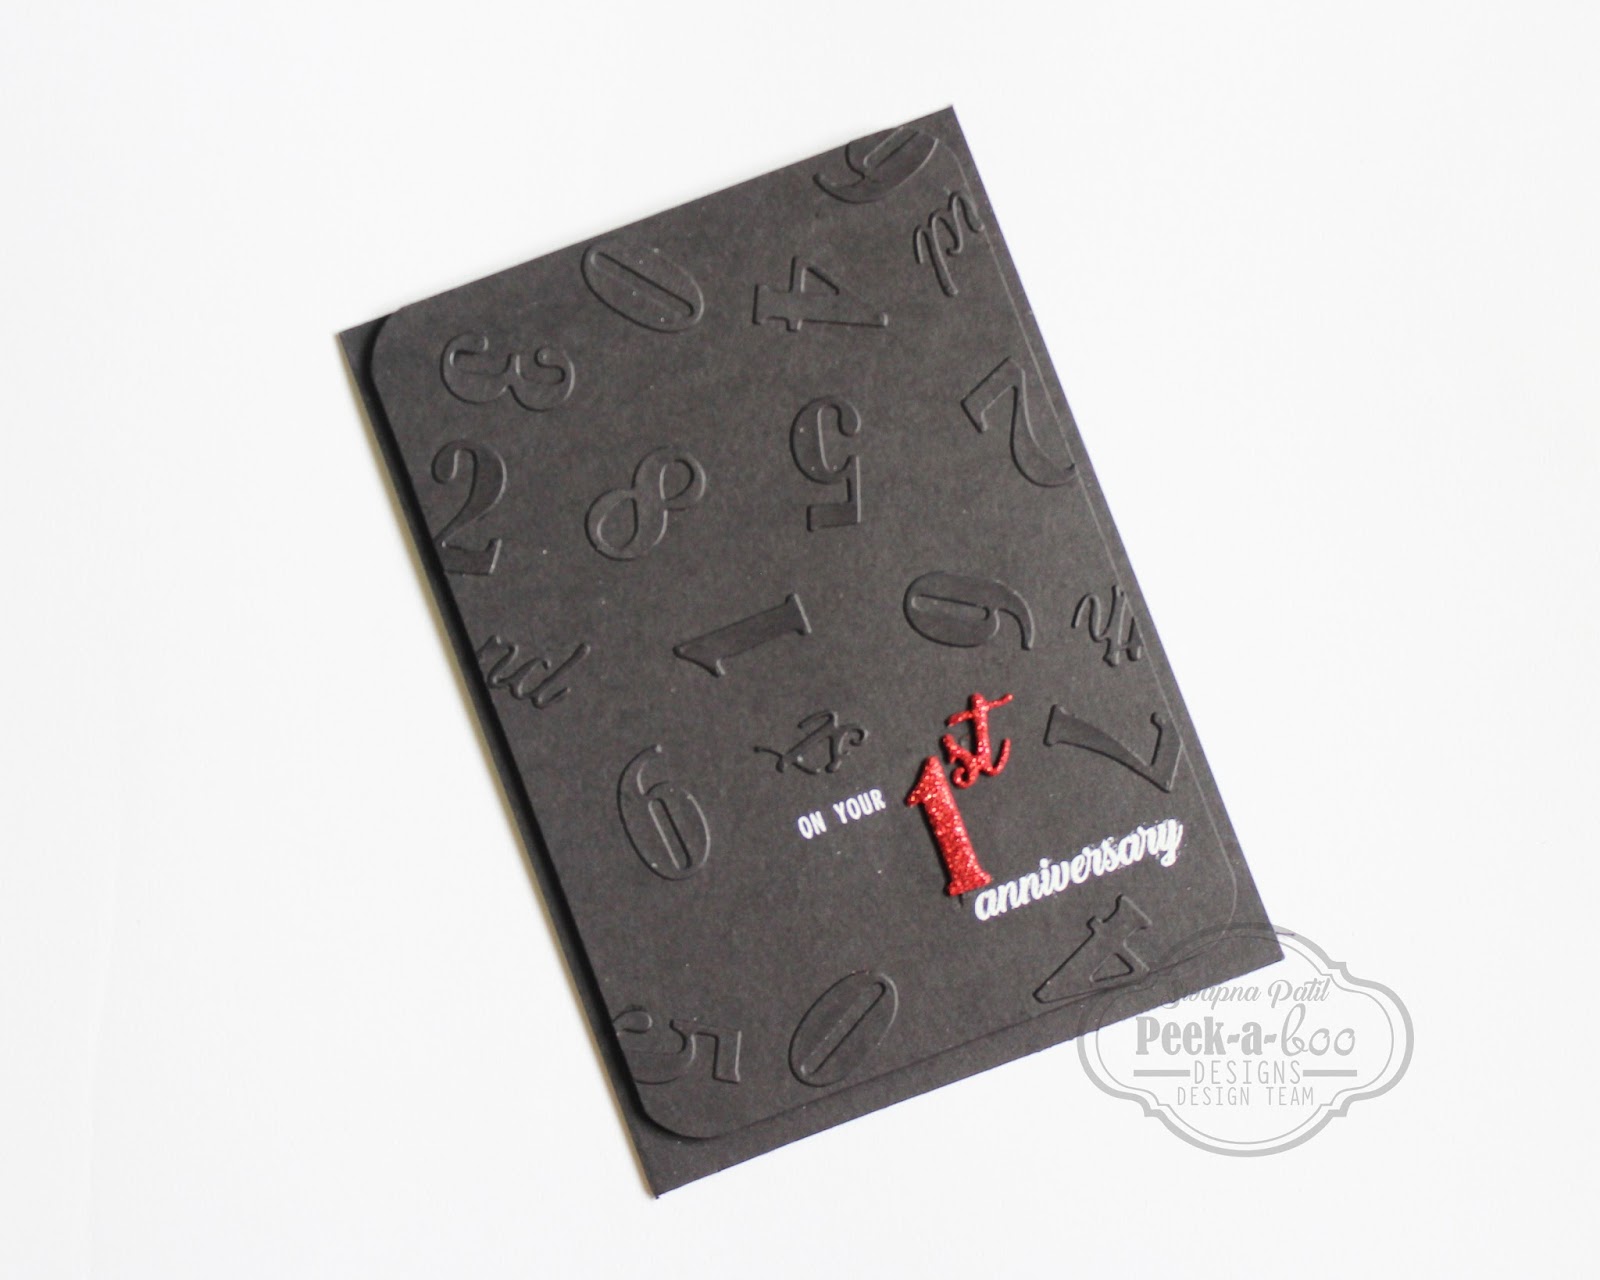
Card #3

** Used number die cuts n made the background by glueing them in random pattern on a black card panel. 
** Die cut number 1 & st with red glitter foam. 
** Heat embossed sentiment with white embossing powder. 
** Foam mounted panel towards top of card base. 
** Glued glitter foam pieces in place to finish the card. 


Here is close up of glitter foam the number background. 


I am entering this card to


Thank you for visiting.. 
Your valuable suggestions are always welcome..

Wednesday, October 12, 2016

Color throwdown #414 - Guest stamper

Hi..
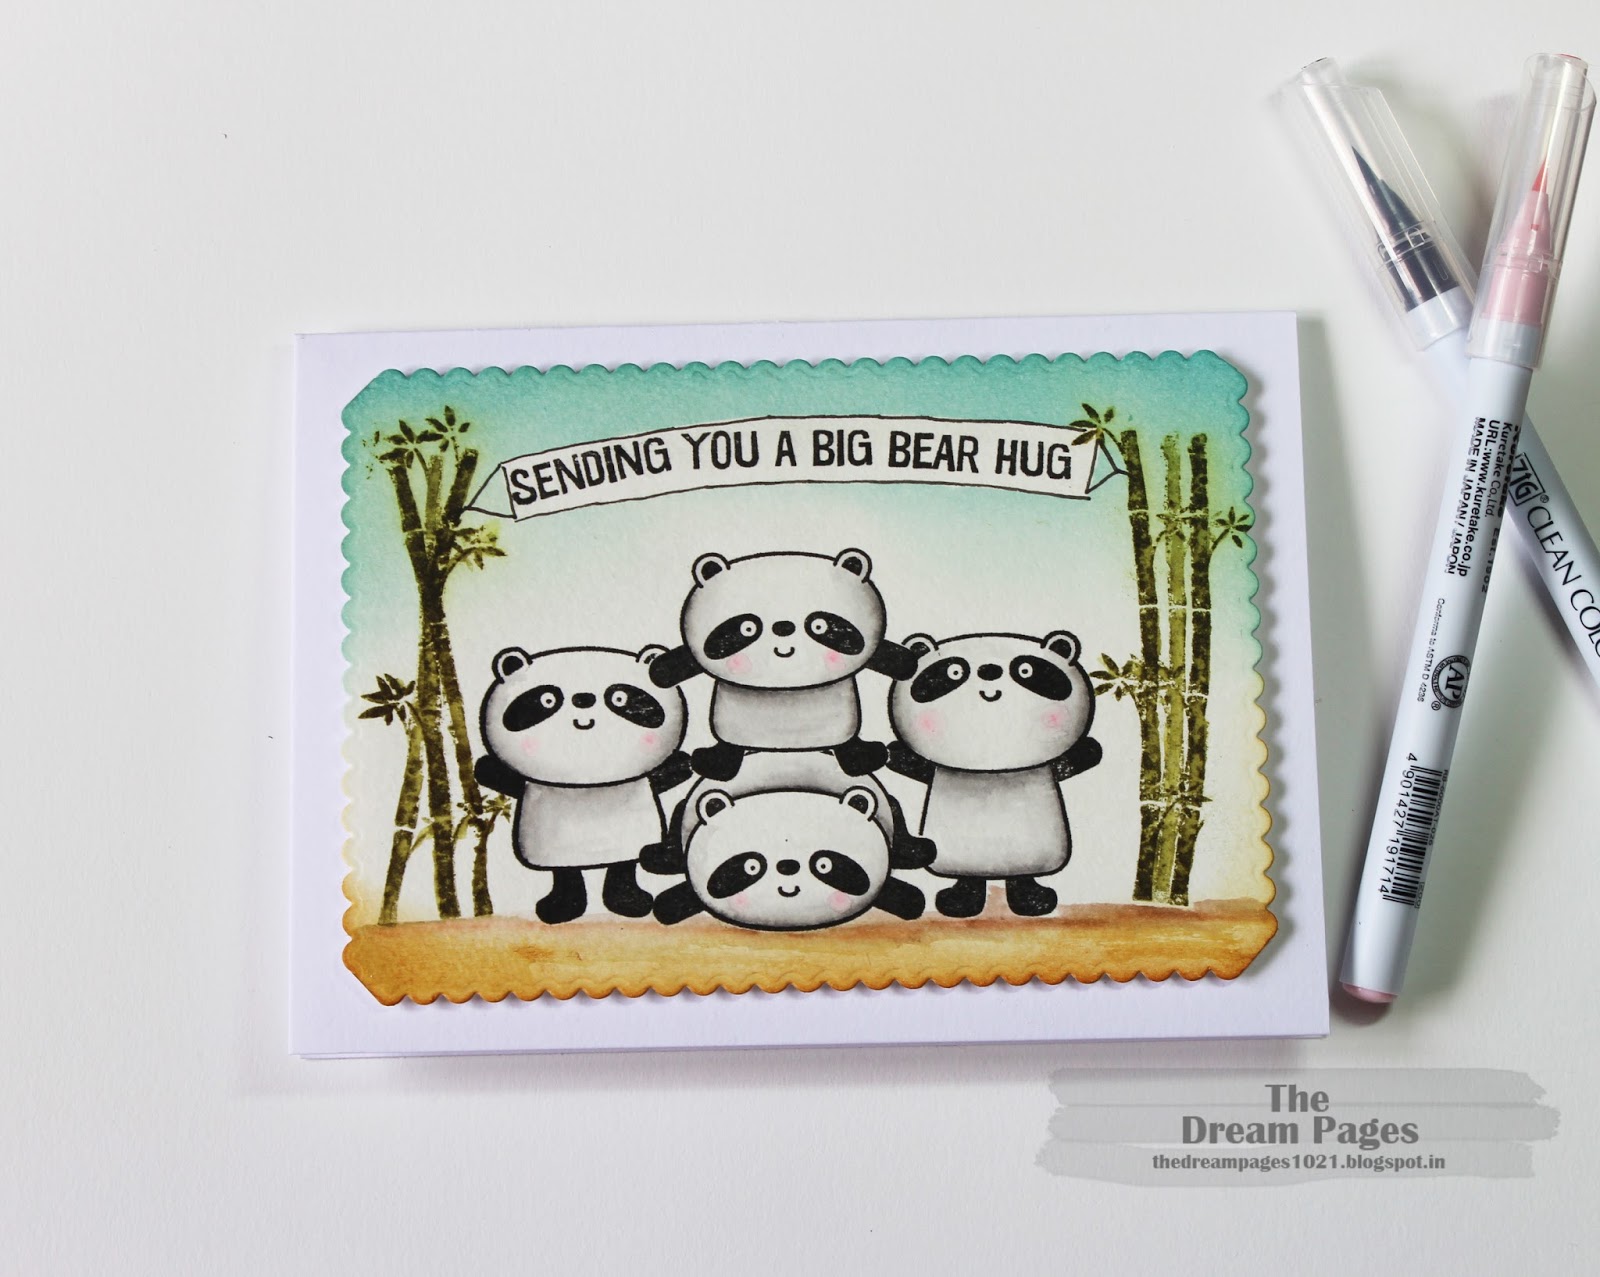
Today I have a card for Colour throwdown #414 . I am so excited for being Guest star stamper.
This week's color throw-down inspiration is 


I made card using MFT happy panda set. I loved those pandas so much that I ended up using all. I stamped the pandas and coloured with Zig marker. I stamped bamboos with distress ink and blended colours with plain water. Then i stamped sentiment and masked it along with pandas so that i can blend distress inks over it. I drew lines around sentiment so that it looks like banner. I die cut the panel with tonic scalloped rectangle die, but i didnt like the corners so i just trimmed them off.

Here is my card


Love those pandas, because i need not to put tons of colours on them..


Supplies

MFT - Happy panda stamp set
Tonic Scallopes rectangle die
Zig markers and distress inks


I am entering this card to 


Thank you for visiting..
Suggestions are welcome..

Wednesday, September 28, 2016

One more card - For challenge

Hi..

Made another card for the same challenge. Hope you like this.

In love with subtle shimmer of wink of stella


The sentiment is so classy


Here is the card


Entering this card to


Stamplorations CAS card challenge


Thank you for visiting...