Showing posts with label copic markers. Show all posts

Thursday, October 13, 2016

Peek-a-boo october release

Hi..

Crafty friends..
Here I am with 3 cards for Peek-a-boo designs. 

Card #1

** This was the card which i made when i was struggling with ideas. 
** I secured card base n stencil and applied embossing paste.  Left it to dry of its own. 
** Sprayed gold shimmer mist from ranger. 
** Gold heat embossed two butter flies and fussy cut them out.
** Coloured one butterfly with copics (carefully) and few strokes with gold marker. Glued it on other plain butterfly.  
** Heat embossed sentiment on vellum n sandwiched it between two scalloped circles. 
** Placed sentiment n butterfly with liquid glue. 
** To finish the card added few rainstones towards top n 3 more on butterfly's body.


Here is closeup of butterfly n gold shimmer mist.


I am entering this card to

 (1 sentiment, 2 die cuts, 2 fussy cut images, 1 stencil)


___________________________________

Card #2

** This is my first attempt in colouring on vellum. 
** I stamped & gold heat embossedin the image on vellum. 
** Used few copics to colour it on back (many have said that colouring directly on heat embossed image with copics will damage copic nibs). 
** I didn't feel like taking risk with glueing vellum on card front. So i left 1/2" towards top so that i can fold and glue it behind. 
** Heat embossed sentiment with gold embossing powder. 
** Added few enamel dots to the card.


Here is close up sentiment and the the coloured flowers.


I am entering this card to


_____________________________________________


Card #3

** Used number die cuts n made the background by glueing them in random pattern on a black card panel. 
** Die cut number 1 & st with red glitter foam. 
** Heat embossed sentiment with white embossing powder. 
** Foam mounted panel towards top of card base. 
** Glued glitter foam pieces in place to finish the card. 
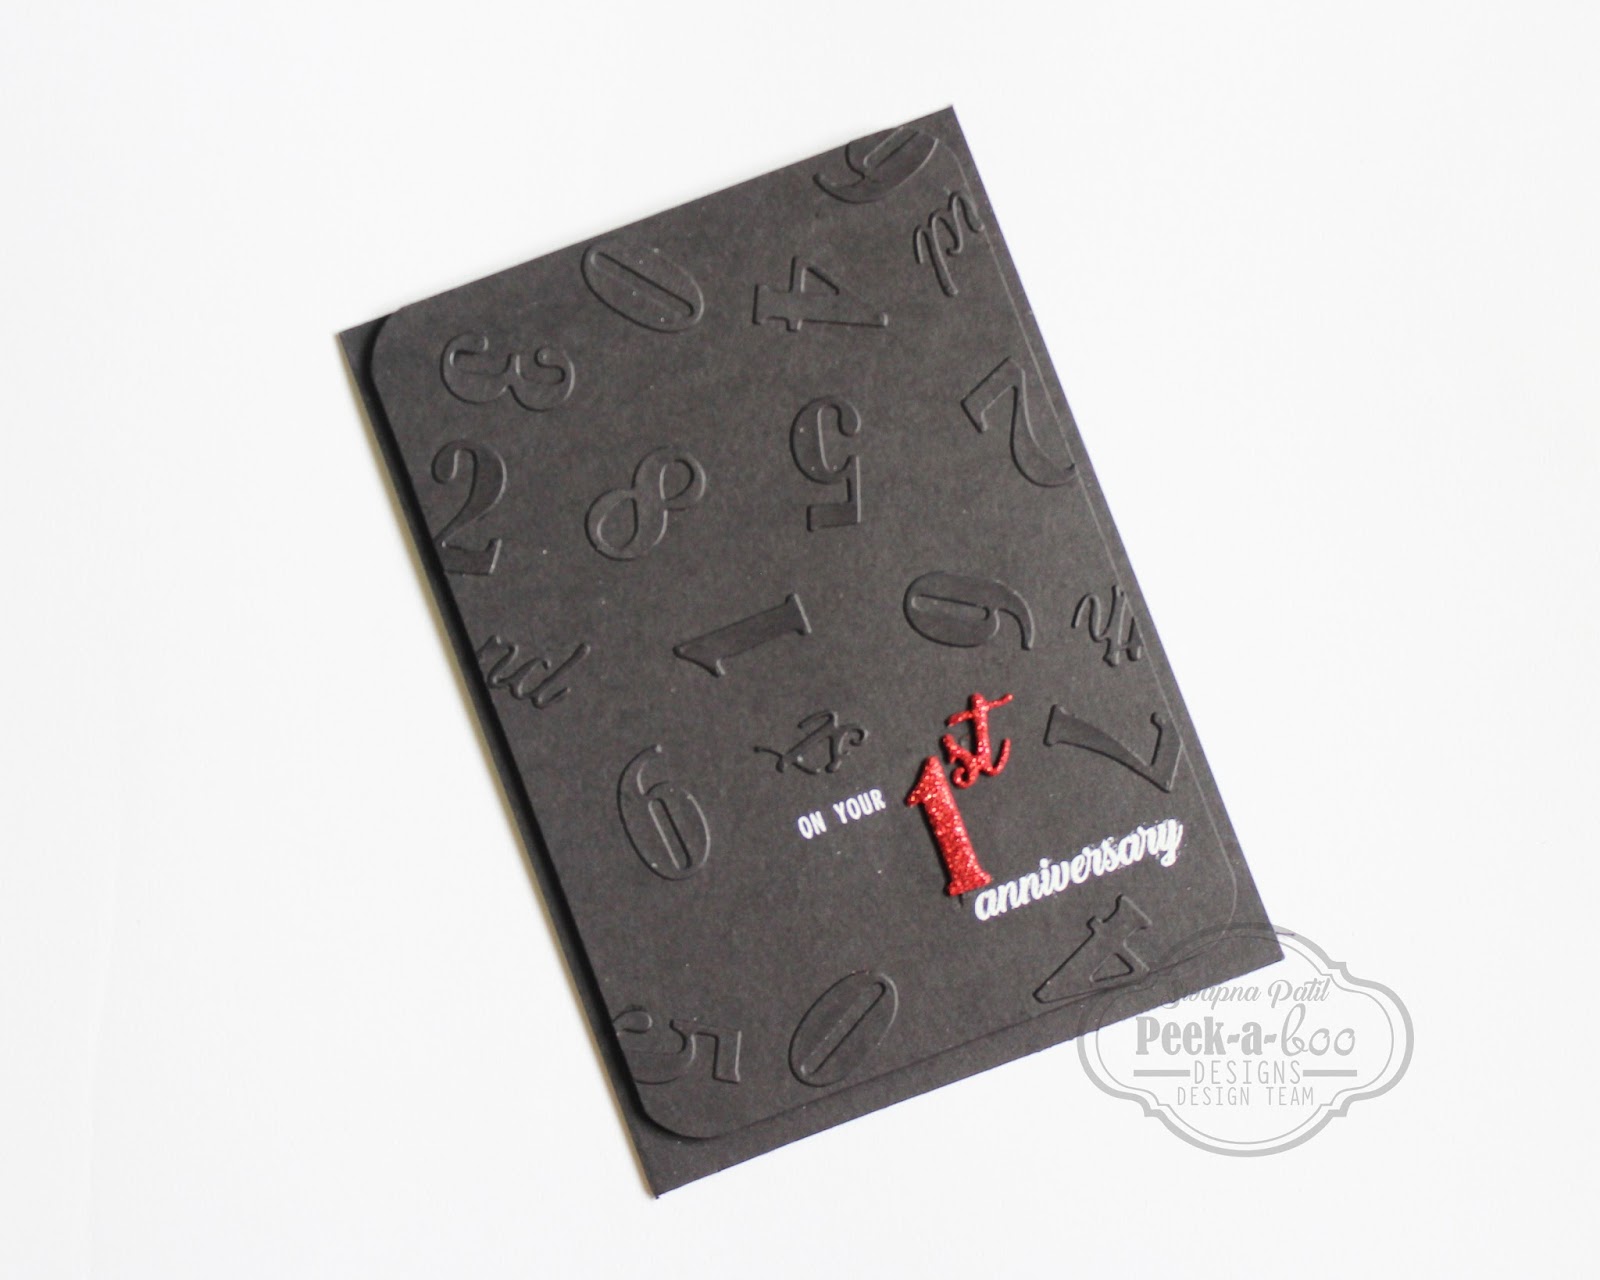

Here is close up of glitter foam the number background. 


I am entering this card to


Thank you for visiting.. 
Your valuable suggestions are always welcome..

Wednesday, August 10, 2016

No-line copic colouring - Altenew stamp

Hi.. Friends...

Today I am here with a simple copic coloured card. I used Best mom stamp from Altenew. Its my dream to do NO-LINE colouring, tried my best to do that. After colouring i die cut the panel with avery elle die, stamped sentiment, added few drops of ranger enamel accent to tie the card design. Foam mounted the panel on top folding kraft card base.

Wish I will keep practising colouring and colouring techniques.


________________________

Supplies

Altenew - Best mom, Wild hibiscus

Copics - RV 69, RV 66, RV 63, E 70, E 74, E 79

Ranger - Enamel accent - white

Avery Elle - Dotted die

______________________


I am entering this card to 


I am using only the theme


Ranganjali - Technique - No line colouring


Thank you for visiting..

Monday, July 25, 2016

Birthday card - Day 20 of daily marker challenge - Altenew Hennah elements

Hi.. Friends..

Today I am here with a simple copic coloured card. I have a small collection of copics so trying to mix-n-match them.

I stamped images from Altenew hennah element set. I usually never mask but thought will do it. I coloured images with copic markers. Applied wink of stella for shimmer. Sentiment is from Altenew label love. To finish off the card added few sequins. Mounted the panel on card base with foam tape.

Thats my card..


I am entering this card to 


Stamplorations - CAS card challenge


Thank you for visiting..

Friday, March 18, 2016

Guest designer - Stamplorations card #2

Hi..

Friends..

Here I am with my second entry for Guest designer for Stamplorations blog (March). You can check out my first entry for Stamploration's blog here.

The sketch for the month of March is


Theme is 


This time also tried to use both the sketch and theme for my card.

First i prepared the background for my card. I wanted to keep the background monochromatic to keep the focus on the flowers. So i used falling hear stencil from SSS to apply embossing paste, and sprinkled distress rock candy glitter to give subtle sparkle to the background. Then die cut a rectangular frame from SSS stitched rectangle die.

Now coming to the focal point of the card. I used stamplorations rose digi stamp (in two sizes) and coloured with copic markers then fussy cut them out, applied wink of stella. Used spellbinders tag die to cut out the sentiment which is also from stamplorations.

I adhered the rectangle frame with foam tape. Glued the roses the way I needed and glued them to make it easy to handle. Adhered the flowers with tiny foam squares, adhered the sentiment tag in such a way that it peeks from the flowers. Made a small bow and adhered it with multi medium matt.

Closer look of flowers...


Closer look of embossing paste with glitter...


This is my card..


I hope you liked my card...

Thank you for stopping by...